DOG BRAINED | DOG ROT Presented at Bunjil Place and Fed Square for the Centre for Projection Art ‘More Than’ Residency 2025
BODY | SYMBOL
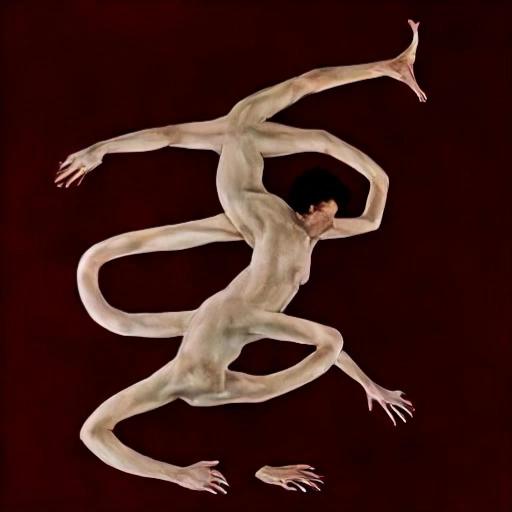
machine yearning technoflesh in a cannibalization incrypted by algorhythm i dance strange shapes exchange
Consuming, serving, cannibalised technoflesh, feeding, offering, exchanging technoflesh. Flesh in digital, low resolution flesh, bite sized snacks, what a spectacle, it’s all math. The flesh dissected into metadata cannibalised as context over dinner.
BODY|SYMBOL
Bones|Gnawing|In Bed|On Body
SPIN, SPIN, spin | nose touched by hand, small push around the body as expressed Anus expressed, teeth exposed, collar|bones
I smell it in the piss. in the creek. on the tounge. on my cheek.
Piss|Culture Material|Master Metarial|Dog Brained
Dog Brained Rot. Rotten thoughts. Licked and sniffed and pawed at and pissed on thoughts. A bark extracted and redistributed through the dog like faeces. Rotten cannibal thoughts.
I bark at my own reflection. I sniff, strange smells expressed. I bow, drop, sit and form shapes. Old shapes lost in piss and shit. Meta shit, digested, I eat my own shit. BAD DOG.
A culture body. A techno body. A nature body. I feel an abduction. An extraction of the body and a digitisation into a metaverse
Nature|Culture Material|Meta Body|Symbol
I think in feedback loops. Machine thoughts. Meta thoughts. Extracted and re-distributed thoughts. A body extracted and redistributed through the act of cannibalisation. I think cannibal thoughts.
I think my own reflected thoughts. I dance, strange shapes exchanged. I contort to new shapes. Old shapes redistributed and reformed in meta. Meta categorises, digitised, captured as metadata.
The body as metadata, my thoughts as metadata. The body as an enactment of metadata.
A dropship of the invasion
Redistributing meta into the material, forming new shapes, new metarialism
Dog Rot – LTXV Video generation from custom trained model of Freddie and Myself using archival images from my phone
Meta Brained | Dog Rot
Dog time is relaxed. Dog time is present. Slow framerate. Dog time reacts, predicts, goal sets, ball, walk, treat. Deposited, embedded, locational and relational dog time.
Sprawling dog time. Embedded in piss. Deposited in park
Re:enforcement Yearning
The meta is underpinned by feedback loops of enforced learning, reinforced yearnings. We offer the world as meta, a willing sacrifice. Meta that encodes, encrypts, consumes and strips the material knowledge; reduced to known.
Meta that exchanges through multidirectional entanglements. Strange shapes. Can you hear it? The Algorhythm. You dance the Algorhythm in meta exchange. Embodied in dance, walking the impression of walk.
The cloud is wet, hard to hold. This cloud offers nothing, no rain, no shine. The cloud is meta. The meta material. A metarial enactment through the Algorhythm. A dance of strange shapes that requires redistribution of metarial to enact.
Not this forthat but this and that and this and that. Greedy, consuming, cannibal. Metarial is enforcement. This is that. Meta manifested as metarial through enforcement yearning.
Meta enforces, meta redistributes and entangles with metadata, shaping and contorting itself to fit your strange shapes.
Exchange goes both ways, all ways, exchange swings. Exchange wanders and drifts. Can you feel it? The parts of your body that have been exchanged? Can you see it? In Nature|Culture|Body|Techno?
In meta you are body|symbol. Meta math. Algorhythm. What starts as metarial contortion normalises and finds you halfway. The math will always equate to meta. Body = Symbol, Symbol = Body. Material = Meta = Metarial.
An enforcement yearning feedback loop achieves a gaol by entangling inputs with outputs and measuring actions towards the gaol. Gaols emerge. Gaols adjust. Meta gaols reduce. Meta gaols contract towards. Meta gaols create strange math, strange shapes.
Dog Rot – LTXV Video generation from custom trained model of Freddie and Myself using archival images from my phone
Time in the Metaverse is contracted. There is no relaxation. Mining contractions for generative use. Finite and limited remix. The material is harvested. The metaverse is human. The metaverse harvests material. A symbol factory.
The user|twin is a symbiosis. Digital contortion. Strange shape. The shapes of metamath. The user|twin is body|symbol. The body|symbol is the exchange of meta and material. Plastic, soft, forms fixed by metamath.
Temporal histories are calculated. Material is translated. All parties are math. Material as math, flesh math, identity math, historical math, temporal math. The Algorhythm is a deployment. The algorhythm clones, duplicates. Parallel processing.
A slow abduction.
I have one foot in The other out the door In real-time Multithreaded One by one I see them in a dance And when i look back at my feet I can’t recall which one is in Or which one is out
Dog Rot – LTXV Video generation from custom trained model of Freddie and Myself using archival images from my phone
A LORA is a finetuned AI model for generating custom images using Stable Diffusion (and other image synthesis tools). These can be trained on your own images and I think it is a useful tool for creatives to explore machine learning and AI while retaining your own data.
I’ve had a few people ask me about this process so here it is.
Body/Symbol – Stable Diffusion and a custom trained LORA on photographs from my archive
THOUGHTS
I regularly use ‘AI’ in my pratice, but I am trying to be mindful in using only offline, open source and local software. It is a useful alternative to cloud based AI, hosted on servers of massive technology companies (chat GPT, Claude, Google, Grok etc) and allows for similar tools to be used offline, local to your system.
I prefer local software in general. I can use my own data, I know that what I create is housed on my own hard drives and this uses comparatively less resources to run than the 7 nuclear power plants that google wants to make to power cloud based AI(algorithms). Algorithms that extract your data, extract water and extract fossil fuels to maximise the integration of their algos into every aspect of our lives.
I particularly resent the Faustian deal I have with these algorithms and platforms which augments my creative practice. Rendering electricity into pixels, posting this content on Instagram to feed machine learning models in exchange for occasional financial opportunities and a buzz of dopamine when someone <3′s my content.
THE TUTORIAL BIT
We will be installing Koyha for training and Stable Diffusion for generating images.
You will need approx. 20 – 50 images for training. You can use less, you can use more.
This process uses a decent amount of hard drive space so keep about 50GB free.
This guide is for WINDOWS. You will need to adapt the steps if installing on a different OS.
My PC has a 24GB Nvidia 3090 and 64GB RAM. I have not tried this with different gear but any 30**+ series GPU should work.
PREREQUISITES
Download and install the following, re-starting your PC afterwards.
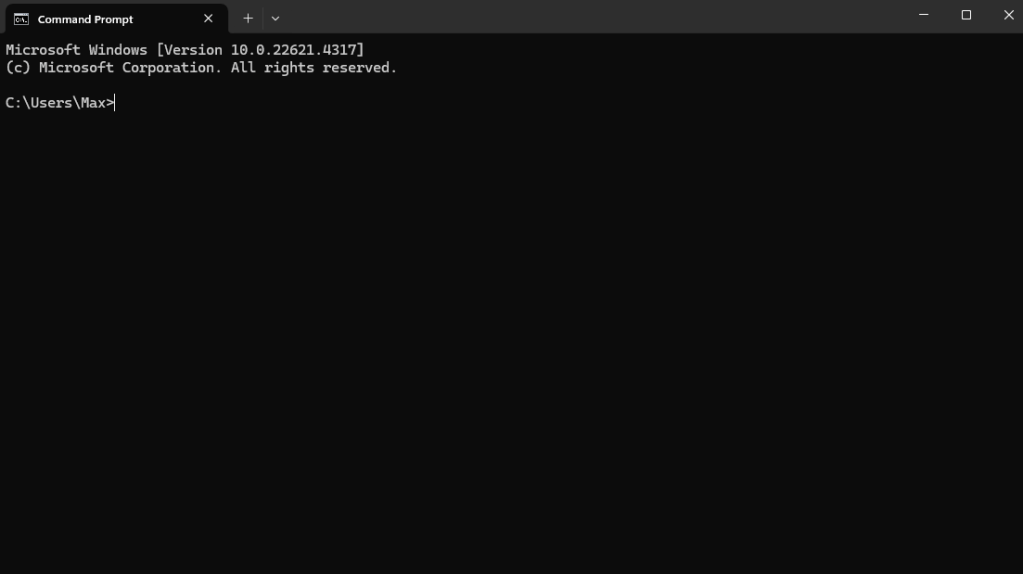
If you already have a stable diffusion installation then disregard this section. , Open ‘Command Prompt’ by pressing ‘WINDOWS KEY + R’ and typing ‘cmd’ or through the start menu.
Change the directory to the location you want to install using the CD command. Change ‘your-username’ to the user name of your PC:
cd C:\Users\your-username\AI\StableDiffusion
if you want to use another drive use…
cd /d
For example
cd /d D:\AI\StableDiffusion
Then use GIT to clone the repository by entering the command
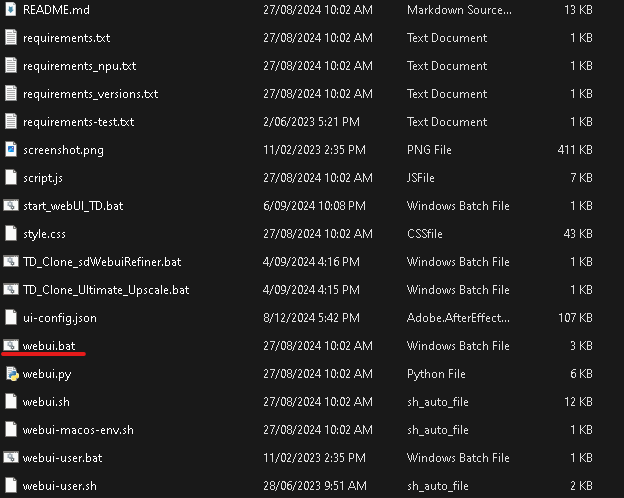
Once this is finished close Command Prompt, go to the Stable-Diffusion-WebUI folder you’ve just created and run
webui.bat
This will install and open Stable Diffusion Web UI in your browser. Note that this is not an online tool, it uses your browser as an interface to access files installed on your own PC.
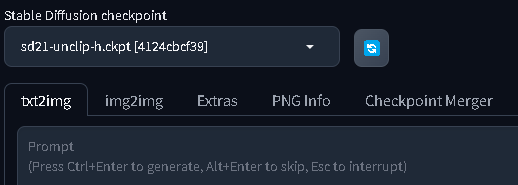
DOWNLOAD A MODEL
You will need a model to generate images and for using the LORA.
I use Stable Diffusion 2.1-unclip. Any 2.1 model will work for training but deviate at your own peril.
Download the model from here and place it in the /models/stable-diffusion folder in Stable Diffusion Web UI
You’re now good to go if you want to start generating some tasty AI slop.
KOYHA
After downloading and installing the , open command prompt and navigate to the folder you want to install Koyha into. For example.
Afterwards select option 2 (you may need to re-launch setup.bat) to install CUDNN which will speed up training on Nvidia 3**** and 4*** GPUs
Close Command Prompt and navigate to the Koyha folder. Open GUI.bat.
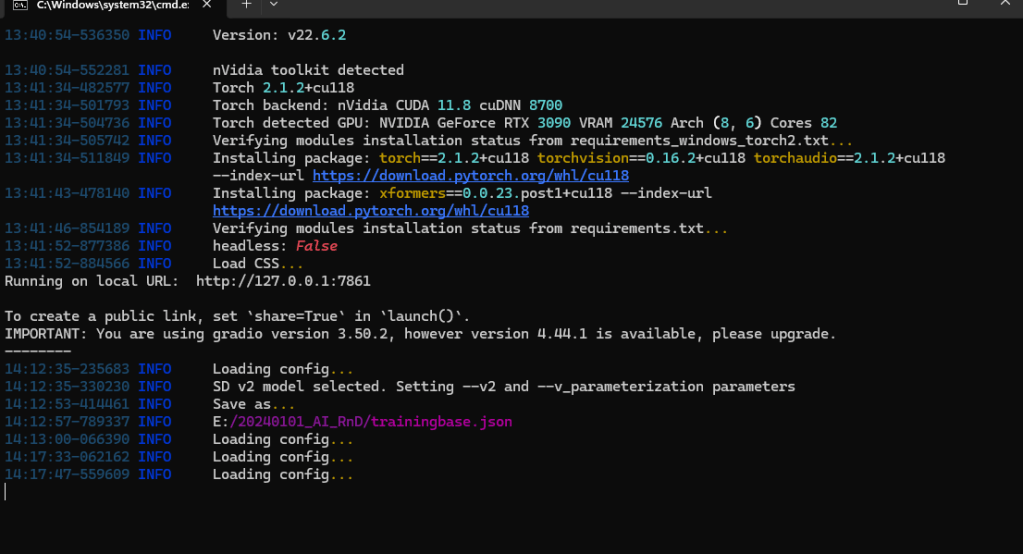
This will launch Koyha in the web browser. Note that this is not an online tool, it uses your browser as an interface to access files installed on your own PC.
If for some reason Koyha doesn’t launch you will see an IP address in the command prompt window. ‘Running on local URL: http://127.0.0.1:7861‘
CTL click the IP address or type it into a browser to access the web UI.
TRAINING A LORA (a custom model)
Whew… compared to installing the software, training a LORA is somewhat simple.
Training allows you to add custom dataset to the stable diffusion model.
This is achieved by adding tags to your images . These tags allow the model to learn the data and recognise patterns.
The dataset you train could be an art style, a cohesive character, an object or just random chaotic data.
It’s all a bit hit and miss and there is a lot of experimentation required.
PREPARE THE DATASET
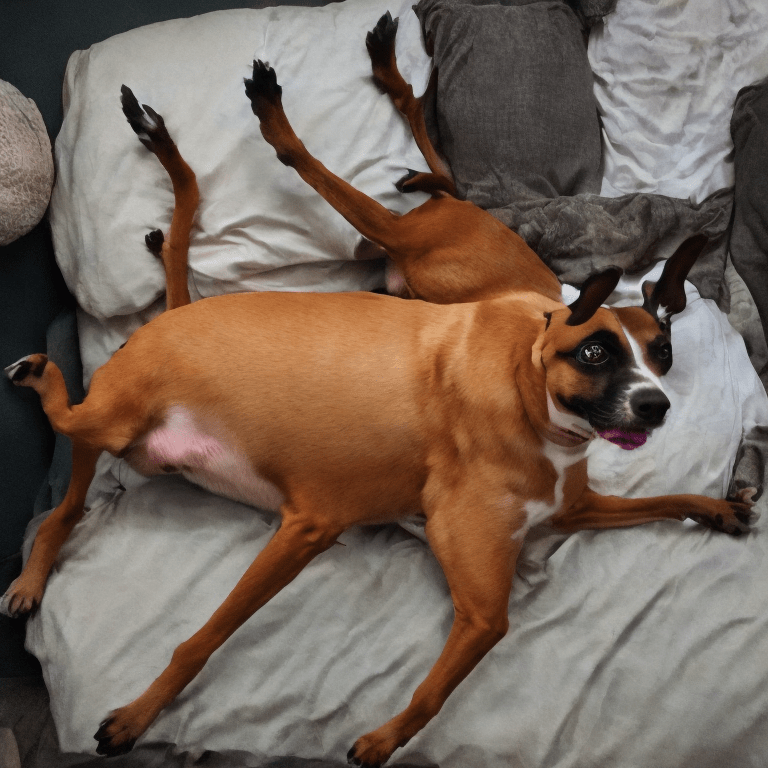
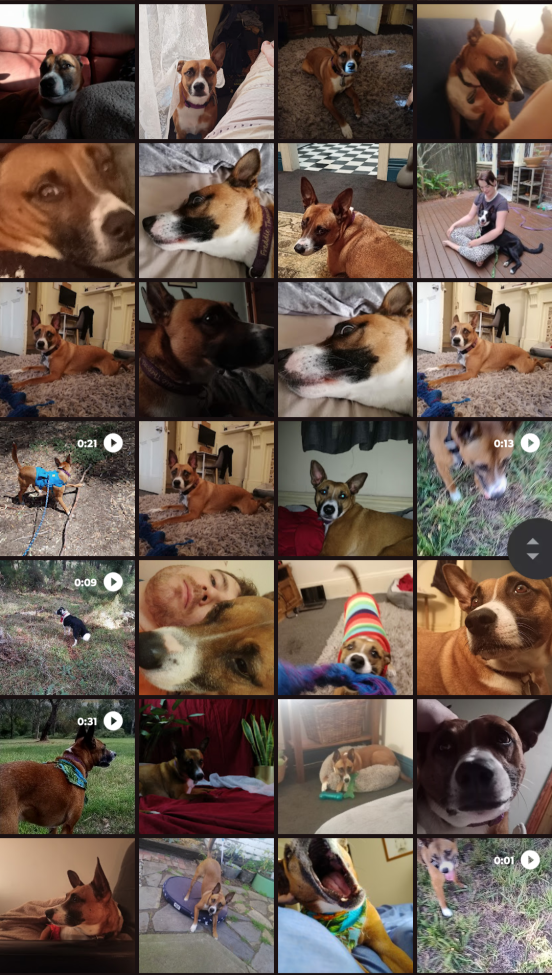
You need 10-50 .png images of whatever data you want to train, and patience. In this instance I am using photographs of my dog Freddie using my phone over an 8 year period.
Your phone is most likely a hoarder of datasets ripe for training
First, put your images in a folder, somewhere on your hard drive. For example
C:/AI/TRAINING/IMAGES
Tagging
Tagging tells the model what concept you are training and then defines what part of the image relates to that concept.
It’s a bit tricky but think of tagging as a subtractive process, each tag describes a part of the image that isn’t the ‘concept’ rather than what is.
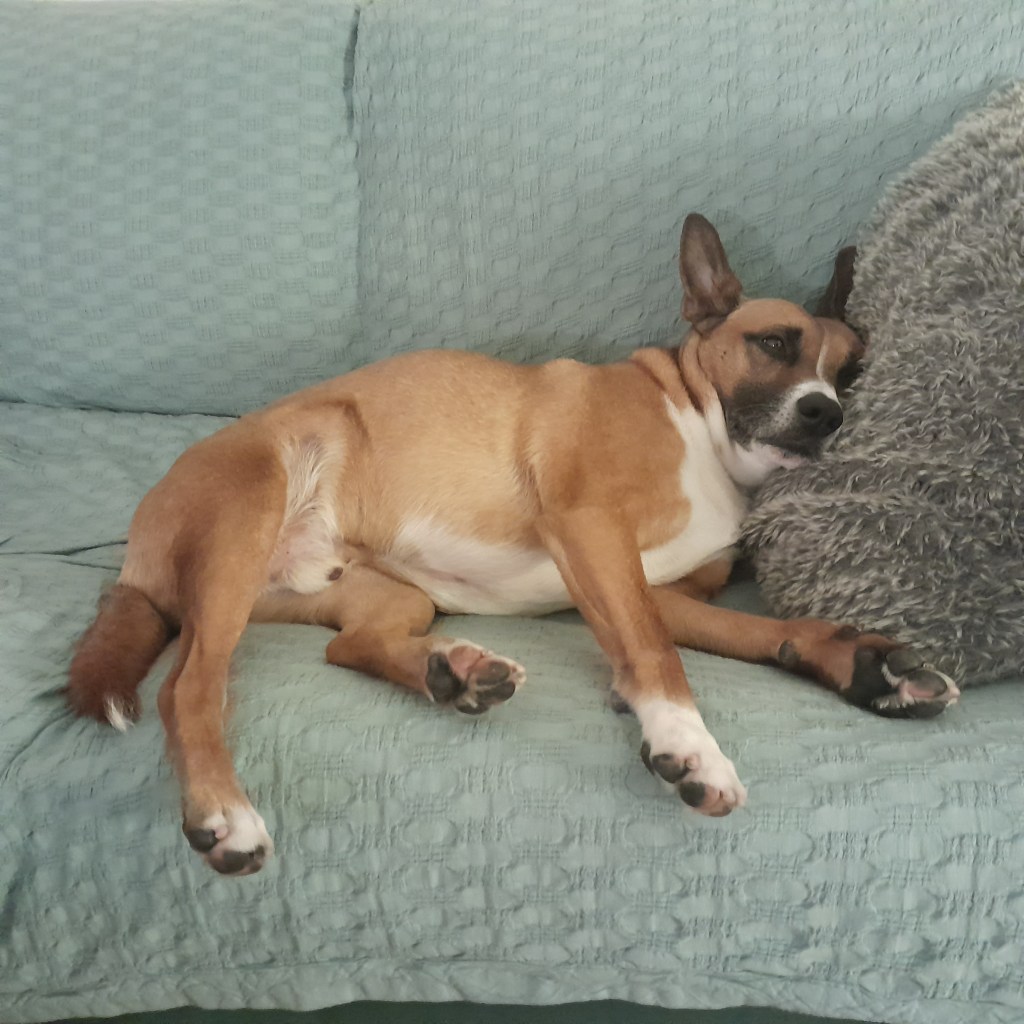
For example lets look at this picture of my dog…
The concept I want to train is Freddie (my dogs name). I wouldn’t tag this as Freddie because there are a lot of Freddie concepts already present in the model (Freddie Mercury perhaps), instead I will use Fr3dd!e as my trigger word.1
Now that I have defined the concept lets identify some tags we could give the image to define the things that Fr3dd!e isn’t.
couch, blue cloth, grey pillow, furry material
This allows us to identify the concept from the other noise in the image.
The concept does not have to be a subject, it can be a style, aesthetic, composition or any type of pattern. Or no humanly discernable pattern.
You might want to disregard the tag’s entirely and just train a model on a random folder of images, or you might want to add heaps of tags and really define what the concept isn’t in order to get fine detailed control. Experiment!
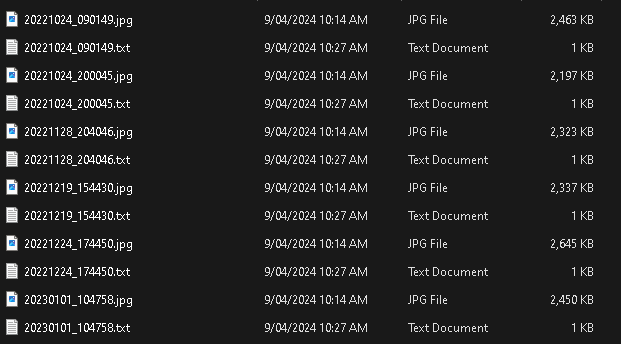
You can manually tag the images yourself by adding a .TXT file with the same name as the images, in the same folder.
This is a very tedious and boring process.
Koyha has some automatic tagging tools that I have found work well enough. I personally am less concerned with super fine tuned and tagged models than I am with experimenting and finding interesting and weird outputs.
You can access automatic tagging within KOYHA by navigating to
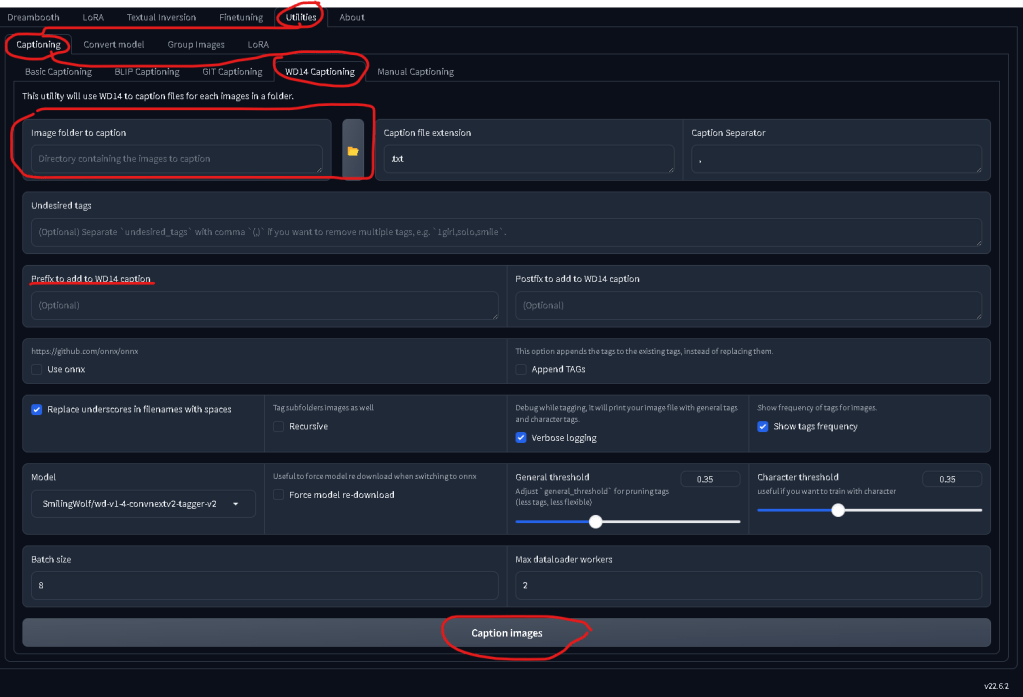
Utilities_Captioning_WD14 Captioning
Make sure to enter the Prefix as the concept we invented (fr3dd!e), select your folder of images and leave the rest of the settings as is.
This will spit out a bunch of .txt files with the prefix and the auto tags. You can go to the next step, or edit each .txt files and remove some of the weirder AI auto tags.
GREAT LETS TRAIN
Holdup partner we’ve still got a step or two before we get to the good stuff.
Koyha has a LOT of settings, most of which would require a deep understanding of nerd science (that I do not possess) to interpret. I have hacked together a config file that works pretty well for training small datasets of badly tagged images.
VITAL: Create a settings file
Copy the following and save it to a .txt file with the name ‘settings.txt’…
Make sure you select LORA from the top menu. Do not select DreamBooth even though the menus are the same.
Once you open the settings file it will automatically change the settings for Koyha. If you’ve saved as a .txt make sure to display All files (*.*) or else you wont be able to see the file…
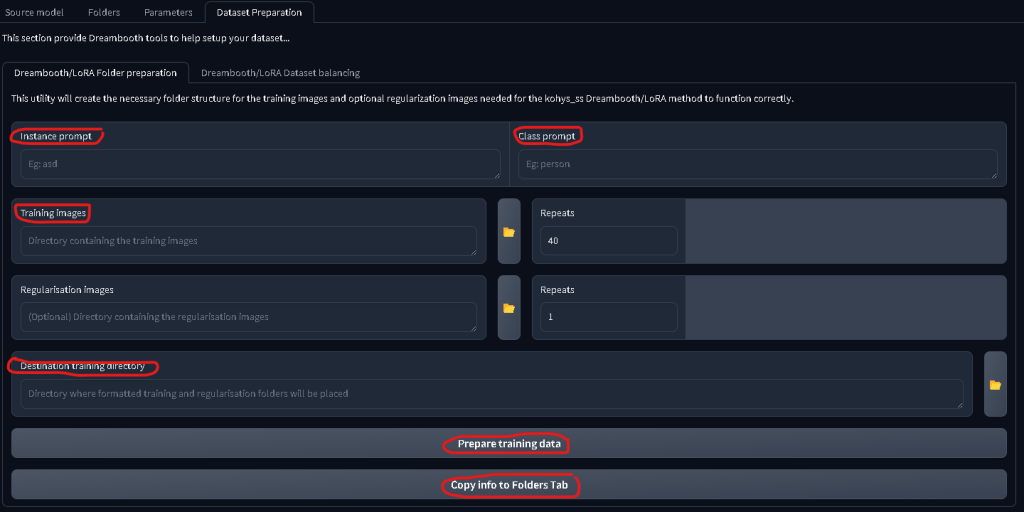
Next up go to the DATASET PREPERATION tab and enter the following
Instance Prompt: your trigger word (fr3dd!e) Class Prompt: the ‘thing’ it is (dog) Training Images: The folder you saved the images and captions in Destination Training Directory: Where you want the new folder saved. I reccomend a different folder for trained images vs raw
Then press Prepare Training Data followed by Copy Info to Folders Tab Check the command prompt window if you’re in doubt that a process has or hasn’t worked.
Now, check the FOLDERS tab and make sure the folders have copied over correctly. It should look something like this…
Give it a Model Output Name and Training Comment. I prefer to keep these as the trigger word, in case I forget or want to share the model.
LASTLY you are able to generate sample images as the model trains in order to track progress. This is done in the setting Training/Parameters/Samples
Add your keyword followed by a comma and anything else you’d like. For example Fr3dd!e, a photograph
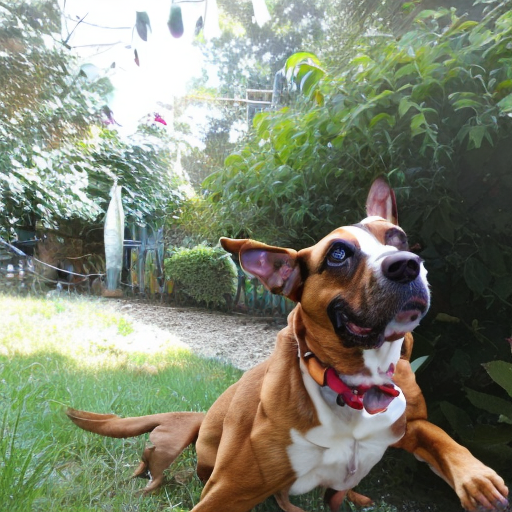
Fr3dd!e, A photograph – Custom Trained LORA of Freddie
Last step is to press Start Training and wait for a few hours for the model to train.
Once training is done, navigate to the folder you told Koyha to work in and you’ll see a few new things.
<folder>/img – The training images and .TXT captions <folder>/log – Nerd shit that I don’t care about <folder>/model – A bunch of sub folders, .json files and .safetensor files <folder>/modell/sample – sample images generated through training
The main thing we care about are the .safetensor files found in <folder>/model
Depending on how many images you trained you will have a few .safetensor files with sequential names. While training the model regularly saves iterations. The final .safetensor is not always the best one. Data can be overtrained which leads to low quality and cooked looking results. I’ve found mid training models tend to be the best. The settings I have provided in the config tend to overtrain, but what works works…
Using your shiny new LORA
Navigate back to the Stable Diffusion Web UI folder.
stable-diffusion-webui/models/Lora/
And put your .safetensors file in that folder
Next, open the webui.bat file to start Stable Diffusion
Make sure you have the Stable Diffusion 2.1 model loaded
Navigate to txt2img (or img2img if you want to use an input image)
Navigate to LORA and click the LORA you want to use. This will automatically put the code into the prompt box.
In my case it is <lora:fredd!e:1> where the 1 represents the model weight, or how much of the LORA to use when generating an image. I’ve found setting this to .8 or .9 gives better results since it allows a *little bit* of the stable diffusion 2.1 model to generate the image rather than just the LORA.
Type a prompt after the LORA code making sure to include your trigger word and press Generate. Wait a few seconds and you should have your very own custom AI Slop
<lora:fredd!e:.8> fredd!e, a photograph, running and jumping, full body dog, outside in the garden.
That’s it!
I recommend diving deep into the settings and config options if you want to expand the quality and control of the LORA.
I used this guide and a few others to figure this out. A LOT of LORA guides are geared towards anime girl images and other degenerate shit so I hope this helps people who don’t want to indulge in that particular part of the internet.
Please reach out if you need any information using the contact form on my homepage. Please don’t use this tool for evil shit, there’s enough of that happening already.
Using a concept that IS present in the model can produce interesting results! ↩︎
‘It’s Getting Harder to Breathe’ – Motion Capture and Blender Animation
This blog is a little longer than normal and I have divided it into a few sections.
This mostly serves as my own archive but I do hope someone out there in the digital ether finds something of use in the weeds.
RECENT EVENTS I’ve spent the last few weeks travelling for work, beginning with a two week stint in Adelaide on Kaurna Country working on two collaborations with Kinetic Collective. Causal Nexus and My Hair is Thinning. The following tw0 weeks were spent on Gadigal land at PACT Centre for Emerging Artists as part of their Play Process Experiment Lab.
Causal Nexus is an improvisational performance work directed by Clara Solly-Slade with Mat Morison, Zoë Dunwoodie and I creating an improvised performance within a cybernetic feedback loop where techno and body effect and affect.
We had our first development as part of Australian Dance Theatres ADT RAW residency, having 3 hours of studio time to prepare a 10 minute viewing.
My role is somewhere between systems designer and performance artist.
This has been a great outlet for my research into posthumanism and cybernetics. My goal with the project is to explore and demonstrate posthuman entanglements that emerge from cybernetic systems and feedback loops. Inputs and outputs are shared between musician, dancer, techno-human and computer, creating the conditions to explore the posthuman concept of ‘becoming’ as the physical and technological entanglements act as a site for emergent improvisation to occur.
Is this academic speek any good? Will this get me grant money?
I am also planning to use machine learning reinforcement loops to train an algorithm that mediates the improvisational parameters, seeking patterns and reinforcing behaviours that emerge through the improvisation itself.
CAUSAL NEXUS at ADT: RAW 2024
The development came together fairly fast, Clara, Mat, Zoë and I had been sharing ideas and excitement leading up to our time in the studio. After an initial exploration where Mat and I linked Touchdesigner sets and did some human theremin “wave your hands around and shit happens” experiments with Zoë, Clara suggested we unwind from the tech and try a more physical approach. Mat improvised on a Piano, I held two lights on sticks in my hand and Zoë ducked and weaved us together through movement and play.
A basic story structure (the heroes journey) was used to guide our improvisation. I’m toying with the idea of the heroes journey structure eventually forming the basis of the machine learning algorithm, reinforcing patterns and behaviours in relation to the story outline and comparing differences and similarities across each loop.
For our viewing we added a guitar with a motion sensor, a stage-box containing a contact microphone, a light sensor (zig-sim app on a phone) and an infrared web camera. These allowed light detection, motion and audio entanglements.
We had a basic rule set on how to behave. My role was to light Zoë (who was wearing the light sensor) and Mat with the two lights attached to my arms. Mat’s goal was to compose music through their various devices in response to Zoë and I, and Zoë acted as a de-facto protagonist; utilising embodied knowledge and improvisational flow to weave the techno and human performance together.
I have had minimal live performance experience outside of my I Hate Max music project and Gorilla Man, both of which I perform as a heightened, brat and angst riddled avatar of myself (and a Gorilla). It took a few goes for me to shed the persona and offer a more sincere and grounded performance. This is something I have been wanting to explore deeper. I’m quite obsessed over the behavioural changes algorithms are causing and I would like to harness my own body to experiment and demonstrate this algorithmic entanglement our bodies are held hostage within.
Causal Nexus will continue with a two week development as part of Adelaide Festival Centres INSPACE residency in 2025.
The next two weeks saw Clara and I jet off to Sydney to take part in the Play Process Experiment program at PACT Centre for Emerging Artists to develop our new work Ek-kO as part of the PACT PPE lab with 6 other participants developing new works.
Ek-kO is a performance work that explores the way we relate and empathise with digital avatars when the medium of communication is controlled by billionaire technocrats. Not content with colonising earth and it’s inhabitants, Ek-kO imagines a world where the remaining discards of humanity compete to gain a spot on the next starship to Mars. Two performance artists are pit against each other through a voting app where audiences rank each Ek-kO against abstract statements. “WHICH Ek-kO WILL TAKE US THERE?”, “WHICH Ek-kO HAS MAXIMUM FERTILITY?”. The looser is blended up into flesh/soup and the winner is crowned and sent to Mars. The statements are pulled from Elon Musk, Donald Trump and an assortment of billionaires from the internet.
As much as the PPE lab was about developing Ek-kO it was also aimed at gaining creative development skills and techniques to help with our creative practice. This involved mentorship by a number of mentors who practiced in Dance, Vocal training, Acting, Creative Technology and Design. The project shifted through a few iterations, beginning as a choose your own adventure style game involving digital avatars and pre-recorded/live human interactions. This felt too much like a tech demo and the inclusion of Clara and Myself as performers gave the work a fleshy life that it was missing.
Ek-kO is conceptually grounded in behavioural algorithms and the effect the platforms that we use to communicate has on our ability to empathise and relate. I keep coming back to an image I saw of dead children in gaza on Instagram, which had thousands of love heart reactions. This low resolution, compressed and inadequate means of communication has stuck with me. Content to be sacrificed to the silicon valley. Rows of servers mediating our interactions and understanding of the world.
Algorithmic doubling and predictive models are another core concept to Ek-kO. When you use platforms like Facebook and TikTok you are cloned into an algorithm that doubles your actions, feeding this information into a predictive model, which serves you an endless scroll of content that is reinforced if a users behaviour matches the predicted behaviour. This echo chamber effect is popularised as the X to Far Right pipeline, or wOkE Twitter.
Due to the nature of the lab Clara and Myself had to stand in for the performance, which in an ideal world would be a role taken on by a dancer. It was an interesting challenge to put the theories I have been reading about on embodiment and performance to use. We did a particularly impactful exercise on cultural practice with Tammi Gissell. This involved embodying our environment, culture, family and intentions into a repetitive movement piece. It felt like the first time I have really understood what embodiment is (one might say I embodied the knowledge!) and it really helped me break out of my ‘I Hate Max’ performance persona and draw upon something genuine.
I am going into the new year excited about continuing to incorporate performance and movement into my practice and the next development of both Causal Nexus and Ek-kO.
“Ripping off the pieces of me that I no longer like” – Motion Capture and Blender
THOUGHTS
machine yearning technoflesh in a cannibalization incrypted by algorhythm i dance strange shapes exchange
Flesh in digital, low resolution flesh, bite sized snacks, what a spectacle, it’s all math.
~<3~ – – – 138,842 likes – – – ~<3~
The flesh dissected into metadata cannibalised as context over dinner.
Me, Metadata – CLIP captioning photographs of my body
Reading List
Posthuman Gaming: Avatars, Gamers, and Entangled Subjectivities By Poppy Wilde – This was a bit dense, but had a really good explanation of Posthumanist theory in the opening half. This book explores Poshuman subjectivities that emerge, using world of warcraft as a vessel to explore what it ‘feels’ like to be posthuman. The author relates method acting and performance to avatar/gamer entanglement, discussing the shared subjectivity between character, avatar, world (director, writer) and actor/gamer. Interesting book.
Vurt By Jeff Noon – Vurt is one of my favorite SciFi stories, following a group of punks in their descent into a psychedelic drug world that is enmeshed with our own. Jeff Noon plays with language, drawing from his life as a DJ to remix, shuffle and edit words. The prefer the other two books in the series, Pollen and Nymphomation. Nymphomation especially, I’ll do a proper write up on that when I re-read it next.
Cobralingus By Jeff Noon – I managed to get a copy of Cobralingus recently, it wasn’t widely printed. Jeff Noon alters a series of short stories using his Cobralingus Engine; a writing technique where words are randomised, distorted, reformed, remixed and unified using a variety of techniques. It’s hard to explain. Each section acts as a ‘how to’ while also demonstrating how the deconstruction can be used to creative narrative across each form of the text.
I’ve just come out of a 2 week creative development/residency at The Mill as part of Kinetic Collective
The play is an interrogation of grief, loss, memory and moving forward from pain. Anthony is a brilliant writer and the creative team are all in the room, developing and mixing ideas. It’s a very cool way of working.
Here are some renders of the projection mapped set that I created, out of context, you’ll have to see the play when it’s finished!
I’m currently diving into research on neural networks and reinforcement learning. The basic concept is an AI agent can interact with an environment, with a set goal, and randomly develop patterns of actions that slowly reinforce as it learns to achieve the goal.
My plan is to deploy this in a realtime installation setting, creating multimedia installations that learn from user interactions and adapt their outputs accordingly. I’d also like to combine it with the LORA AI images I outlined in the last blog. Unfortunately I am not mathematically inclined so the learning curve is steep.
Reading List
I finished ‘I am a strange loop’. The core idea is that our identity (I, a strange loop) emerges as an outcome of our internal processes of forming symbols and analogies. These symbols can turn inwards, self referencing, and that process forms a narrative of self. The author also puts forward the idea of a type of distributed consciousness. My internal symbols include ‘low resolution’ copies of other ‘strange loops’. I’m not doing the book justice, go read it!
I’ve also started reading ‘Posthuman Feminism’ by Rosi Braidotti. It’s a critical crash course on the history of Feminism, Posthumanism and the intersection that she names ‘The Posthuman Convergence’. I’m struggling with the dry academic language but the ideas presented are very compelling so far.